Welcome back to the Kung Fu Maintenance Blog! Health is so critical that I am rewriting this particular post for the Kung Fu Maintenance Blog. Welcome back! I am convinced these articles will help you much!
In my opinion there are particular vitamins and supplements that deliver the most value and giving the most to your heart health, stamina, and vitality.
I will put links on this page to examples of the supplements I am writing of and in the video speaking of. I make a small commission on anything ordered through the links. The above video also explains many of these points plus gives more practical tips.
First you will highly benefit from a good multivitamin. However you do not want just any multivitamin. What you want is vitamins sourced from wholesome foods, fruits, vegetables, herbs etc… Preferably organic ingredients items that have not been submerged in pesticides.
The Texas Superfood products I also really like http://amzn.to/2pA6iJa though they are more expensive.
Following a good multi-vitamin the next important supplement in my opinion is CQ10. CQ10 is normally produced in the body but after a certain age body production begins to dwindle and therefore the benefits of a supplement. Ubiquinol is one of the better forms of CQ10. I am just sharing my heated opinions here not cold hard facts so further research on your part is recommended.
The next supplement I believe you will see the most benefits from is a good Omega-3. There are many types of Omega 3 but the two most common forms come from olive extracts or fish oil extracts. Both types have their pros and cons and this is a huge area of study. With fish oils you want to avoid any with much mercury contents. This is a huge area of study in itself. I personally try to alternate between these two sources of Omega 3 to get the benefits of both. Omega 3 is like a lubricant for your body. Keeps everything oiled properly. Less friction equals less pain all around. I am oversimplifying things a bit here for sure. I hope to go into this subject in more depth in the future.
Next in importance on me Kung Fu Maintenance list is magnesium. Magnesium is a relatively inexpensive mineral that affects so much in your body!! Bone strength, heart rhythm, blood pressure, inflammation and much much more. Again this is a huge area of study.
I hope to delve into these different areas a bit more in the future as there is so much there. Often people who drink too much alcohol do not have enough magnesium. Many who take medications for ailments such as cancer, Chron’s disease, diabetes, kidney disease, and other conditions, lack beneficial amounts of magnesium.
The next several supplements I think are highly beneficial as well just a little more complicated to take as explained in the video but very helpful to your overall vitality so do check them out as well. Super Bio Curcumin (fights arthritis and other inflammation) ,Niacin,Resveratrol, and Vitamin B-12 (for energy and nervous system health)! I look forward to covering these subjects much more in the future!!
I hope to help the overall quality of your life to be improved and spare you much headache, time, and money, plus help you gain some nice ground through every post, page, and article, and combination of words here in the KFM Blog!
The KFM Blog Vertical Blinds Skyscraper Video Repair List Post
KFM gives an Ultimate Video Vertical Blinds Skyscraper Video repair list of links to the most likely vertical blind repairs you will need to make in your lifetime.
Vertical blind headrails are often very sharp being made from thin sheet metal and slats can also cut you as they are often thin plastic. Extra care should be taken around these sharp parts. Make repairs at your own risk. I have donated blood many times and would spare you those experiences.
Perhaps the most common vertical blind repair needed is Vertical Blind Slats Broken Repair.Vertical blinds often break off the portion of the slat where the vane is inserted into the stem.
Vertical blind vane breakages are often caused by wind through an open window, not turning the blinds open before sliding them open, and sometimes these just get pulled on and broken off.
There are many ways to repair broken vertical blind slats.
ThePunch Method you use a hole punch to punch three holes side by side on the opposite end of the blind slat to make a new hole for the slat to hang from. Than, if preferred, the broken side can be trimmed off to be straight. This does make the slat shorter than the others. Sometimes the last blind slat overlaps baseboards and shows less. So this is sometimes a good slat to trade with to give a better appearance.
The Knife or Chisel Methodis similar but uses a different technique. You can see each method by clicking on the video links. This procedure you use a small chisel or knife to puncture a new hole similar to the punch method and having the same problem of a shortened blind slat. Again changing the slats to one of the ends can leave the blinds with a better finished look.
TheHot Glue Method does work and does not shorten the blinds but sometimes can be a bit of a mess. I think it is better used for broken blind stems that have fixed grommet ends where stems are not as easily changed.
TheVane Saver Methodis I think one of the best methods of repair short of replacing the blind slat with a new one. These slat savers are especially useful for special finish designer blind slats with unique finishes that are not easy to find or replace. Here is link http://amzn.to/2kKrdoY(Amazon Link) to the Vane saver repair clips. This is the best way to repair these in my opinion as the repair does not shorten the blind slat. Repair clips are usually made of metal and slipped over the broken portion of the slat making a new place to hang the repaired vane.
IfAll The Blinds Wont Turn this is often a case off all the slats overlapping the wrong way. The way to quickly remedy this situation is to poke the top corner of the wrong way blind slat(as shown in the video) to change the way the blinds overlap.
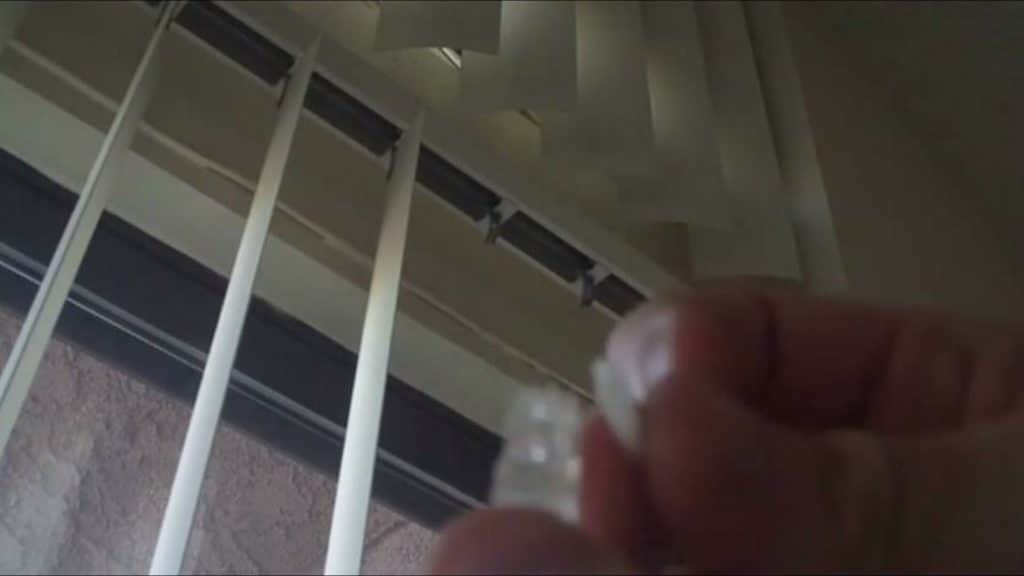
If anIndividual Stem Wont Turn the cause is often a broken stem or missing comb gear. ABroken Stem often has broken teeth so it may only rotate partially or it may keep popping out of step. This can also be caused by a Broken Comb Gear.
Missing Stem And Comb Gear Replacing as shown in the video is not too difficult but the parts are very small and the repair takes a little patience. The easiest way is to rotate the blinds open center. Hold the replacement stem with its gears inserted into the replacement comb gear and push it up and into the carrier with the missing stem.
If you can not get them to go in together another way is to put the comb gear in first, teeth up, ridges facing the opening, with a pair of needle nose pliers. Than insert the stem and pop it into the carrier. Often when you do this the stem will pop in but the comb gear might not have popped in all the way. The trick here is to examine the comb gear. Look to see which way rotating the wand will draw the comb gear into the carrier. If rotated the wrong way the blinds will often fling the comb gear and stem out like a pair of tiddly winks.
Here is a Trick To Replace Gear Stems For Fixed End Blinds. The trick as shown in the video is to carefully drill through the top of the vertical blinds headrail. Position the hole according to the stem position. If centered drill the hole in the center. If off center drill the hole off center. This will create a place that you can push up the old gear stem through the headrail and than insert the new gear through the hole into its place. Often the grommets that hold the headrails together are one time use only. Drilling through the rail can make a way to make repairs in the present and future.
If you haveVertical Blinds Stems That Popped Out.the procedure is similar as above and shown in the video. This sometimes happens when something is in the way such as a toy or couch and the blind wand is rotated. This sometimes forces the stem and or comb gear to pop out. This happens quite often with self aligning vertical blinds as they are engineered to pop over into line a bit easier if out of step.
With self aligning blinds first make sure all blinds are overlapping the same way or correctly and than you can just gently rotate the wand all the way one way and than the other way. Each gear has a little stop on the outward facing end that cause the gear to pop over as needed to bring the slats in step.
With other blinds do not try to force the master control to turn the blinds or it will break the control. For these you will want to take off the corresponding slat than grasp the offending stem with a pair of pliers and gently pop the stem over into the correct orientation. Yes this procedure sometimes breaks the stem, comb gear, or carrier, so be ready to make further repairs if needed.
If you have Vertical Blinds Individual Stems That Won’t Turn the repair is often similar. Sometimes it is broken stem gears and sometimes the comb gear will have popped out. Sometimes you can find the little comb gear fallen on the floor or in the window track.
Sometimes, with wand controlled vertical blinds, if I need just one comb gear I will take it from the first carrier. That takes away the rotation of the first slat but it turns the first slat into a window viewer to see if anyone is outside easily. It being right next to the wand control makes it convenient to control that first slat by hand.
If you have a Vertical Blind Wand That Came Off it is a fairly easy task to set it back on. Just position the wand at the correct angle and you can hook it back on to the master control. There are a few other types of wands. Some have a slide that slips up to cover the hook opening. Some have a hook that rotates into place to open and close the hook.
Vertical Blinds Master Control Brokenis often caused when something is in the way of the blinds turning (couch, toy, box, broom, mop, chair, clothes, curtains, out of line slat etc..) and the master control is forced in an attempt to rotate the blinds closed.
To get at the master control for either repair you will need to remove the end cap. There are many types of end caps. Some use a clip, some use a grommet, some a screw, some multiple screws, some various combinations of the above and more to hold on the end cap. Just understand that these were engineered to be able to be easily assembled plus somewhat easily disassembled (even if a little less so) and repaired.
After removing the end cap you will often need to release the rear carrier catch or stop so that you can slide things out of the headrail. Some of these use a c clip. Some a hook. Some you can can just press up on the hook, others you will need to remove the hook by removing or loosening the end cap screws. One trick if you have a c clip break when you try to remove it or re seat it is drive a small screw through the headrail to create a new stop to act as the final carrier catch stop.
Vertical Blinds Sticking When Sliding is often caused when manufacturing, shipping, or installing. (See my tip towards the bottom of the page for getting less damage when ordering.) This can also be caused if the headrail was hit or dented somehow. Anyway what happens is a slight bend, dip, or twist. in the headrail causes that carriers to hang up, click, or even cause the carriers to come out of the track completely.
Sometimes damaged headrails can be repaired by first sliding the carriers back on track properly and than bending, twisting, or hitting the headrail back into proper shape. Sometimes it is best to just change out the offending headrail.
Headrail damage is also the most often cause of Vertical Blinds Carriers Separated although if something was in the way such as a broom fell between the slats and the blinds were forcefully slid open that could also cause some carriers to separate. Sometimes you can repair the carrier link or sometimes you can link the separated carriers together.
To relink the carriers you will need to follow the instructions above for removing the end caps and releasing the back stop. Once done you can slide the assembly forward out of the headrail far enough to expose the broken portion of carrier linkage. Sometimes you can just reinsert the carrier linkage by rotating it back into the corresponding next carrier slot. Sometimes you will need to change out a broken carrier. The video Vertical Blinds Carriers Separated makes this a bit clearer.
Vertical Blinds Hard To Slide can sometimes also need the headrail to be bent into shape but before you go there it is a good idea to lube the blinds first. Petroleum jelly will work in a pinch however I think it is best to use a silicone sprayhttps://amzn.to/2BF7SzW(Amazon Link) as it dries and still maintains its lubrication qualities. It is a little smelly when first applied but a dry lube will be less likely to collect hair and dust.
Silicone spray is also great for patio door sliders, window tracks, garage, and screen doors!
Vertical Blinds How To Lubricate.So you have your silicone spray ready. What you want to do is slide the blinds all the way open. Then spray the entire track of the head rail with the silicone spray. Wait about twelve minutes for the spray to mostly dry. Next slide the blinds closed and rotate them opened and closed a few times. Waiting the twelve minutes will keep the spray from dripping onto the slats but still leave it a tiny moist to work onto the teeth of the comb gears. If you see any dripping before sliding wait a bit longer before sliding closed to prevent getting any drips on the blind slats.
One of the main causes ofVertical Blinds That Wont Turn Open All The Way is brackets that do not extend far enough from the wall or a portion of the wall. This can also happen from blinds out of step or from anything else that would block the blinds. Also sometimes a whole set of blinds can have a portion of the the slat stems rotated out of step and need to be rotated as discussed above in the section on Vertical Blind Slats Out Of Step.
Check out these videos also on Vertical Blinds Hitting Wall and Custom Extension For Vertical Blinds Hitting Wall In the custom extension video I wound up using the existing brackets and than adding the new brackets to the old so that I could slide out the headrail to get the further needed clearance. There is always a way!
Vertical Blind Slats That Are Too Long can be trimmed down with strong scissors such as butcher scissors. It is a good idea to use a template such as already trimmed to size slat. Slide the top end of your template blind and the blind you want to trim and cut the bottom of your new blind to size. Continue to use the same template for your new blind slat and cut one slat at a time for best results.
If you have Vertical Blinds With Loose Bracketsthere are a number of ways to tighten these up. Sometimes you can just tighten up the screws but sometimes you will run into some stripped out screw holes. In some instances you can just run new screws or larger screws into the studs.
If the holes are in a spot where there is not a stud you can use a drywall anchor or a molly to strengthen things up. Sometimes you will want to move the bracket to a stronger location where a stud is available. In some instances you may want to just add a new bracket to add strength and avoid the need for patching and painting.
Vertical Blinds Fell Off Brackets. Yes this does happen. Sometimes one way to keep it from happening again is to squeeze the freedom loving bracket or brackets a little bit, either with your hand or a pair of channel locks. Than you can insert the side ridge of the headrail into the groove hook of the bracket and rotate it up, snapping it into place of the flatter release tab portion of the bracket. Freedom is good but we still have a job to do to keep things going!
Vertical Blinds End Cap Came Off. As written before there are many types of end caps. Some use a clip, some use a grommet, some a screw, some multiple screws, some various combinations of the above and more to hold on the end cap.
Vertical Blinds Dragging On Floorcan happen from headrails that have fallen out of the brackets. This can also happen from blinds that are positioned to low or sagging mounting brackets as shown in Vertical Blinds Dragging On Floor Cheap Trick. If something is added behind the bracket you want to make sure that it can not fall out and become a choking hazard.
Before you reset a Vertical Blinds Valance That Came Off you may want to watch this video. I show how to reset the valance clip without breaking it. Okay, okay. I will just tell you the secret here. What you want to do is make sure that you clip the back on first and then rotate the front portion on. The back portion has a bit more of a hook and is more likely to crack if you put the front on first. This type of valance clip the valance portion is rotated into place inside the valance to hold it.
Vertical Blinds How To Replace Bent Slats. Replacing broken or bent slats is not to difficult. For many blinds slats you just lift up on the vane/slat and pull it to the side to remove it. For other types you have to pick up the back of the stem a little bit. For those once you remove one slat you can use the slat to slip under the next stem so that you can pull out the next slat.
You could replace the whole fill valve. But you could also actually take this portion, turn it to the side, and than you could pull it off the float spindle part that just pops in. You can see the calcium and mineral deposits that were on there.
Now cleaning the deal isn’t my deal. I am just doing the repair but I wanted to flush it out to prevent any call backs. Prevent any debris from staying in there and when initially turned it on, I turned it on a little too hard. Kind of splashed up and over which actually won’t hurt things here.
So here we take the new one, put it in and just rotate it to the side. That just clips it in and than you take the float arm and it just pushes into the arm handle. Just like so here.
Just check for the proper operation and than we can turn the water back on and test it out. Make sure it does its thing and than its got this little cap here. That you just push on. But I want to leak check it first to make sure it is not leaking water beyond it and that it is working good.
Everything looks good there. Turns off the water. And now I can put the top back on. That just presses into place.
Again checking to make sure it shuts off. And than we will just make sure it has got a good flush power. We can adjust that if need be. I show that in another video.
Clean up all the water here and I will leave the cleaning of that to somebody else but. Anyway. Back in the mix.
That is one way you could do it if you did not have enough room to get in there. You can see all the calcium deposits here. If those get built up just right than it will make the toilet whistle.
Well recently I showed you on another video where I had this dryer filter catch which I didn’t know what it was called.
Turns out it’s actually called a slide and what I wanted to show you today is an easy way that you can find parts that you’re looking for or schematics for appliances that you are having trouble finding parts for.
Welcome back to Kung Fu Maintenance where I show you how to make the most likely repairs youll neeed to make in your lifetime.
If you would like to get the latest videos, subscribe! Than hit the little bell icon below the subscribe button and it will notify you of any new videos when they are released for you.
Okay so I had this dryer and its got a slide that was broken. What I did was take a photo of the model number. That is here on my phone. And we take that model number and we go to this site here which is Sears Parts Direct.
I will leave a link in the description below and if click that link and anything you order through there I may make a small commission on anything that’s ordered. Help support the channel.
I wanted to preface this video by saying that everything you see when you actually go to the site will be much clearer. I shot the video not with a screen recording software but with just a camera aimed at the screen.
Things will be much clearer when you click the links in the description below and actually go to the sites.
So I am entering the model number. DSKS333EC1WW and than we hit search. And we are going to search it under model number.
And that’s going to bring up our model number, which this one is a GE dryer. Now there is actually lots of different model numbers or different models on this website.
And here we go. This didn’t have a perfect match for the EC1WW but we have got enough items here that are close enough and these are most likely going to use the same part.
So lets click this 2 one I clicked on the model number here and what this has is different parts diagrams and this site has a ton of parts diagrams that you can look up.
Now if you couldn’t find your model number you can use the finder here. It will show you the place that most model numbers are kept. For this one it was inside the dryer door. On the face.
Now what we do is click here on this backsplash cover right here you can see the picture here. And this will bring up the parts diagram.
You can also search for the part by name if you knew what that part was.
Now we just scroll down. No thanks. I don’t want to chat right now.
Right here. On the door is where. This is the part that was broken. 3043. So you come down to this part 3043 and there is our part number right there. WEIM407 and we can add that to cart if we wanted to buy it. This one is $50.25.
But the other thing you could do is take this part number and you could search any other number of sites with it. So it is a pretty cool deal. It just has pretty extensive break downs on everything that you might need for different parts. Lot of different manufacturers. Lot of different part numbers.
I will leave a link in the description to the page where you can order stuff or you can research stuff. Again I make a small commission on anything ordered through there. So it helps support the channel.
And if we wanted to purchase this we would just click on add to cart and that would add it to the cart and there is the deal. You can view cart and checkout. Again if you wanted to you could take this part number or the substitution part number and search the web elsewhere to locate that part. Makes it nice and easy. I could take this and search it on Amazon or wherever it is that you want to search.
Okay I will leave the link in the description for you to get to Amazon as well. Again I make a small commission on anything ordered through there. But what you do is you take your part number. So this one here is the optional part number that they had for this dryer lint trap slide. And than you come over to Amazon and you search for that. Or another site but just giving you the example here.
This is another way I make commission. If we can find the part cheaper. Makes sense right. You want to get the best value for your money.
Okay here it is on Amazon. $13 and free shipping on Amazon so you know probably a much better deal. Again I’ll leave a link in the description to Amazon.
It’s just a nice way to look up the part you need. You can come on over to the link here in the description or Sears parts direct. Search the model number and find your part. Now sometimes parts may not even be available. Or where they are available from. But once you have got that part number than you can come to another site and search the part. Find it much easier.
Again I’ll put links in the description below. That way I make a small commission. Help support the channel. And I just wanted to show you a nice easy way that you can locate parts and locate the schematics for your particular parts that you need.
Parts diagrams it just makes things a lot easier and a lot faster. If you have got a refrigerator. You need to know which kind of filter to use. You can come through this site.
If you bookmark this page. Bookmark this video. Save it in your favorites or save it in your watch later. You can always find it later to look up parts schematics when you need to and than find the part that you need and than shop around. And hey there is a coupon on there. Alright.
So a lot of you maintenance guys will be ordering parts through your supply wherehouses, such as HDSupply, Wilmar, or others. This is a great way to be able to look up the part that you need and get schematics for whatever part you need.
If its a refrigerator gasket. If it is a refrigerator door light switch. Whatever it is. You can look it up on this site. Sears Parts Direct and than be able to contact your supplier where house for special orders for a particular part number.
Makes it much faster. And for many of your units you might have a lot of the same unit so bookmarking pages. Bookmarking the schematics or wiring diagrams or diagrams, parts diagrams for your different appliances model numbers can help speed things up in the future.
You have got it at the ready.
If you need a new door. Whatever it is that you need. And if you need a regular part that comes up often you can bookmark those pages to make things a lot faster for ordering and processing everything that you need to do your job better and faster.
That is what Kung Fu Maintenance is all about. Making life much easier for you. Thanks for watching, liking, and subscribing.
A quick search on my youtube channel of whatever your maintenance needs are. You should be able to find a bunch of different material that will be helpful to your maintenance needs.
So for the longest time I’ve been trimming these Fluidmaster fill tubes down. But today wanted to show you one reason you may not want to trim that fill tube down.
I’ve always thought just getting it out of the way was a good thing but here is the reason is that if you have calcium and mineral deposits or high calcium and mineral content in your water you are going to kind of want to rinse out the tank kind of regularly.
Having some room to aim the hose and aim things around to rinse things off makes it nice and convenient to do.
Now you can take a wet dry vacuum and vacuum out the bottom and that is recommended once in awhile. But you really want to be able to rinse off the sides.
Now you could get in there with a wash cloth and do it that way but you also could leave the fill tube a bit longer and than just use it as you see here. Use it to wash down the sides so that calcium mineral content can be flushed down into the bowl or rinsed down into the bowl.
You’ll want to support this tube here. Don’t just put it in with one hand like I did. That’s a bad idea. That tube in there can get pretty brittle over time. I’ve had one snap off so I really shouldn’t have done it this way.
Rinsing out this tank once in awhile can help keep your toilet bowl cleaner, longer. It’s just getting rid of the mineral contents so all that stuff is not settling inside the tank and looking all cloudy and everything. Also anything else that gets in there.
Sometimes sand or other debris can go through the system and get into the tank or rust. All those things will make the bowl dirtier faster. So this is just a nice way to keep things cleaner and maintain it once in awhile.
So today’s video I am showing how to cut toilet bolts so that you can use the threads in the future. Later on. It’s not too complicated. It’s very simple.
You know these are metal bolts or brass. I believe. You just want to use a hacksaw. This one I am using a small short hacksaw.
This is especially for toilet bolts but it works for other bolts as well. The trick is to put your nut on and than cut your bolt.
With a toilet bolt a lot of times is all you have to do is cut it about in half. Then you can break off the end that is left.
By putting the bolt on first when you undo the threads that will straighten out the threads so that you can put another bolt on or the same bolt on next time.
That is the trick to preserving the threads or making the threads good when you need to cut a bolt shorter. Again this is especially useful for toilet bolts as these have a cover that goes on and you want that to be able to hide the yuckiness of the toilet bolt.
Lots of you probably know this one already. This is for those that don’t and just a nice simple easy one today on how you can cut toilet bolts and preserve the threads or use the threads in the future.
Thanks for watching, Kung Fu Maintenance. Over and out!
This is a place for you and friends to add knowledge and understanding of how things work. How to maintain plus how to repair. The site is set up for a nice quiet read. The videos can be played out loud or muted for added detail. Along the right side you will see a listing of all articles written with new articles being added regularly.
The articles and videos are composed to help you learn and understand some of the best ways and the different factors involved in repairing appliances, washers, dryers, swimming pools, spas, tools, air conditioners, electronic entry gates, household items, cell phones, computers, and much more. Everything to do with maintenance. To make repairing things fun and make life more enjoyable.
The KFM Blog is out to help with understanding the different aspects of needed repairs to save you money if you do need to hire someone else.
This site has special advantage for those learning or wanting to improve their english as the articles can be easily translated by clicking on the appropriate language selection on the right side menu. There you will find two different translation services. Use which ever one produces better results for you.
This site you might share with those you know who are wanting to better themselves in the maintenance field (Air Conditioning, Swimming Pool Service, Hospitality, Hotel Industry, Building Maintenance, Housing, Janitorial, etc…)
This is also useful for those in foreign countries who attend to english speaking customers who want to improve their level of service through better understanding. improved english pronunciation, and maintenance skills at the same time.
The site can also be useful in reverse for maintenance techs who want to service in foreign countries as they can translate articles into the language they are trying to learn.
All right today I wanted to go over the five most common problems with HVAC air conditioners.
Say you go to turn you’re air conditioner or heater on on cool or heat and auto and you lower your temperature down and let’s say nothing happens. The unit doesn’t turn on the blower doesn’t turn on at all first thing you want to check is the breakers.
It could be a tripped breaker. You often have a breaker for the condenser and then a breaker for the fan itself this one is right here for the fan. So make sure your breakers are not tripped. Sometimes if they’re tripped they will trip halfway and when you reset it you need to turn the breaker all the way off and then turn the breaker all the way back on.
Next thing to check is the door switch often there is a service door switch on the air conditioner heater unit it’s usually located right here (top left side of the air handler) what you want to do is push on this left side to see if that will engage that switch. So if you got it on heat or cool and auto already. A lot of times that will be the problem.
Sometimes you might need to add a screw. Like this one a screws been added to make sure that it is held in place. Or you can tape the door shut. If you do add a screw you want to make sure that that screw isn’t going to be penetrating into anything. Like any tubing or anything like that such as any refrigerant tubing behind it you want to make sure you pick a place that is good and you don’t want a screw that is too long you don’t want it to poke into anything that it’s not supposed to.
Ok the number three most common problem with air conditioners. So one we had a breaker tripped, two, the service door switch.
The third most often cause of an air conditioner not working is inside here if this hatch comes open. Sometimes let’s say it wasn’t secured properly it’s got this like a mailbox latch that latches the door into place and if that came open and this hatch falls open a lot of times what happens is your evaporator coil will freeze up into a block of ice.
So while you are there you got your filter and your filter make sure you have good air flow that a lot of times what will happen is that will turn to a block of ice and you won’t even be able to pull the air filter off of it.
What you want to do is come over here to your thermostat and just turn the cool side off and just turn just the house fan on so turn the fan on on and put the switch here on off that way you can defrost the air conditioner and you also kind of want to watch it to make sure your condensation line doesn’t overflow.
It could get built up with too much water from the ice melting. So something to keep an eye on there but keeping the fan on will help melt the ice faster and dry everything out.
You know get back to normal. It takes a little while and than you’ll be able to put it to cool and auto again and you’ll close this door and again if you need to you will add a screw or you can add some tape to make sure that its held in place and doesn’t come open on you again.
Number four most common problem with HVAC heaters and air conditioners is a fan motor that won’t start. Often you can just replace the fan start capacitor.
I have a video showing you how to do that, “First Thing To Try” “Before” you just run out and replace the “Motor” is to try “Replacing” the fan start capacitor and it’s not truly a start cap it is actually a run cap but replacing that capacitor that capacitor helps get the fan started going and gives it that initial kick to start. Without that it can’t start it will just sit there and hum and sometimes you can even push start it with a pen or something. You know “very carefully”.
And the fifth most common cause of losing your heating or air conditioning is a faulty thermostat so you can click on over to my video about how to troubleshoot a faulty thermostat.
Anyway those are the five most common problems with heating and air conditioning that you will come across that will give you a no cool or heat call, and I have videos on all of those so you can check them out. I will try to put the links here or right on this videos so you can click over to watch those.
And thats the five most common problems with the indoor side of HVAC heating and air conditioning.
Here are some quite interesting videos on the application of 3D printing to construction. It seems to be very promising for the future when combined with concrete and has the potential to completely revolutionize the way we construct homes and office buildings.
There is a lot of waste and areas for improvement under current construction methods and the following ideas seem to lean towards an inevitable means of cost savings, time savings, energy savings, energy efficiency and safety improvements. Though I think it sad that many jobs may change, I still think it useful to understand and be ahead of these changes so that those who are in the industry can better position themselves for the future.
I hope to be doing more posts soon on many possible advancements in technology of maintenance and construction. Your sharing this post will help let me know the level of interest in the subject of technology as it applies to maintenance and construction.
This is how to replace a diverter valve on a compression style tub set up (such as a Price Pfister). What you want to do is turn your diverter so your water drains down into your tub spout
You don’t have to turn off your water but you do want to make sure that the water is drained from your shower head so that’s why you are putting it down to your tub spout.
What you need to do is remove your index button by putting the knife underneath there.
This one has a philips screw to remove the handle.
And it’s a good idea to plug your toe stop
so you don’t loose your screw down the drain.
Next your going to undo your escutcheon just a little bit. And than you can twist out the sleeve like so with the escutcheon.
And you don’t want to grab it on the ends because you don’t want to damage the threads especially on the ends.
Now this exposes our diverter valve. What you want to use is a deep socket set and slip that over the body and than if you have a piece of laminated
paper or even a piece of paper. What you can do is
insert that into your hole and that way divert any water that, leftover water that may come out from the hole.
There is probably not really any water left in here because
the deal is turned off but anyway just in case almost
there
And there is the old diverter valve and the washer. Were also gonna look to make sure this little flat washer came with it
take a peek inside there
to make sure everything is out of there which it is
prepare our new diverter valve
there is our old one. You can see our new one has the same washer
the same washers here
and were going to want to finger tighten the sleeve and then we’re
gonna want to wrap teflon tape around there.
Now you really don’t have to but I recommended it in that it will make it
easier to remove it in the future should you need to.
And the best way to wrap teflon tape is like so, with the teflon tape at the back hold it on with your finger skip the first one or two threads
to avoid cross threading if you need to twist it a little bit
so that you can skip the first
one or two threads you can do that
and you are just going to go three or four turns around.
Give it a nice coating of teflon.
It’s kind of funny teflon
pans are what we cook with, so, that shows you
that it keeps the food and everything
from sticking against there
same principle here makes it easier to
remove in the future
but it also
fills in any regular gaps in the material. Undo our diverter valve all the way. You can see
how it pushes this out.
And this is why this is a compression style diverter valve. It has got a bibb washer here.
You can rebuild these if you need to by replacing the bibb washer
as well as replacing the sleeve
washer that’s inside here
That’s another story.
I will have to make a video on that one someday. For now
Anyway, here goes. Insert it nice and easy
and hand turn it in to
avoid getting it cross threaded feel for it
to make sure everything is good there.
Slip our deep socket over the top and tighten it up nice and tight. And go a quarter turn past tight. There we go.
Nice and snug there.
And now we are ready to test it for any leaks.
So I am going to unclog my drain for a minute.
And I am going to go ahead and turn the water on,
and look inside there.
And we are going to try to set it on the tub portion.
So that it goes into the tub. So here goes.
Everything is working like it should and we are going to look for any leaks inside there. And feel around inside there. It looks like we are good. No leaks there. Everything is working like it should. So now peaking in there, I’ll aim my shower head away, I am going to switch the diverter to the shower portion. That is to the shower portion and everything is working like it should.
Switch it back to the tub.
And we have no leaks there. So were good there.
Resetting our faucet handle. We are just going to spin the sleeve back in till it tightens all the way up. And we want to make sure this sleeve tightens all the way down into the handle. And we’re good there.
Than we can go ahead and tighten the escutcheon.
and this is a good point to clean
up our escutcheon here. And we are going to make sure the rest of our escutcheons are tightened up nice and good. So that everything seats against the tub enclosure.
And than we’re ready to insert our handle.
Tomorrow I am getting some
new handles so this handles not going to be the prettiest handle in the world.
I will be replacing it tomorrow so no big deal here.
Just going to show you how it is done. And than the diverter gets set down. That way when we turn on the water it’s showing that it is going down into the tub spout. And when we turn it up for the shower it’s showing that it is going up to the shower. That’s how to replace a diverter stem for a compression style fitting.