Kung Fu Maintenance demonstrates how to use pressure tests to find even the smallest hidden plumbing drain line leaks.
How To DIY Sink Drain Pressure Test To Find Leaks
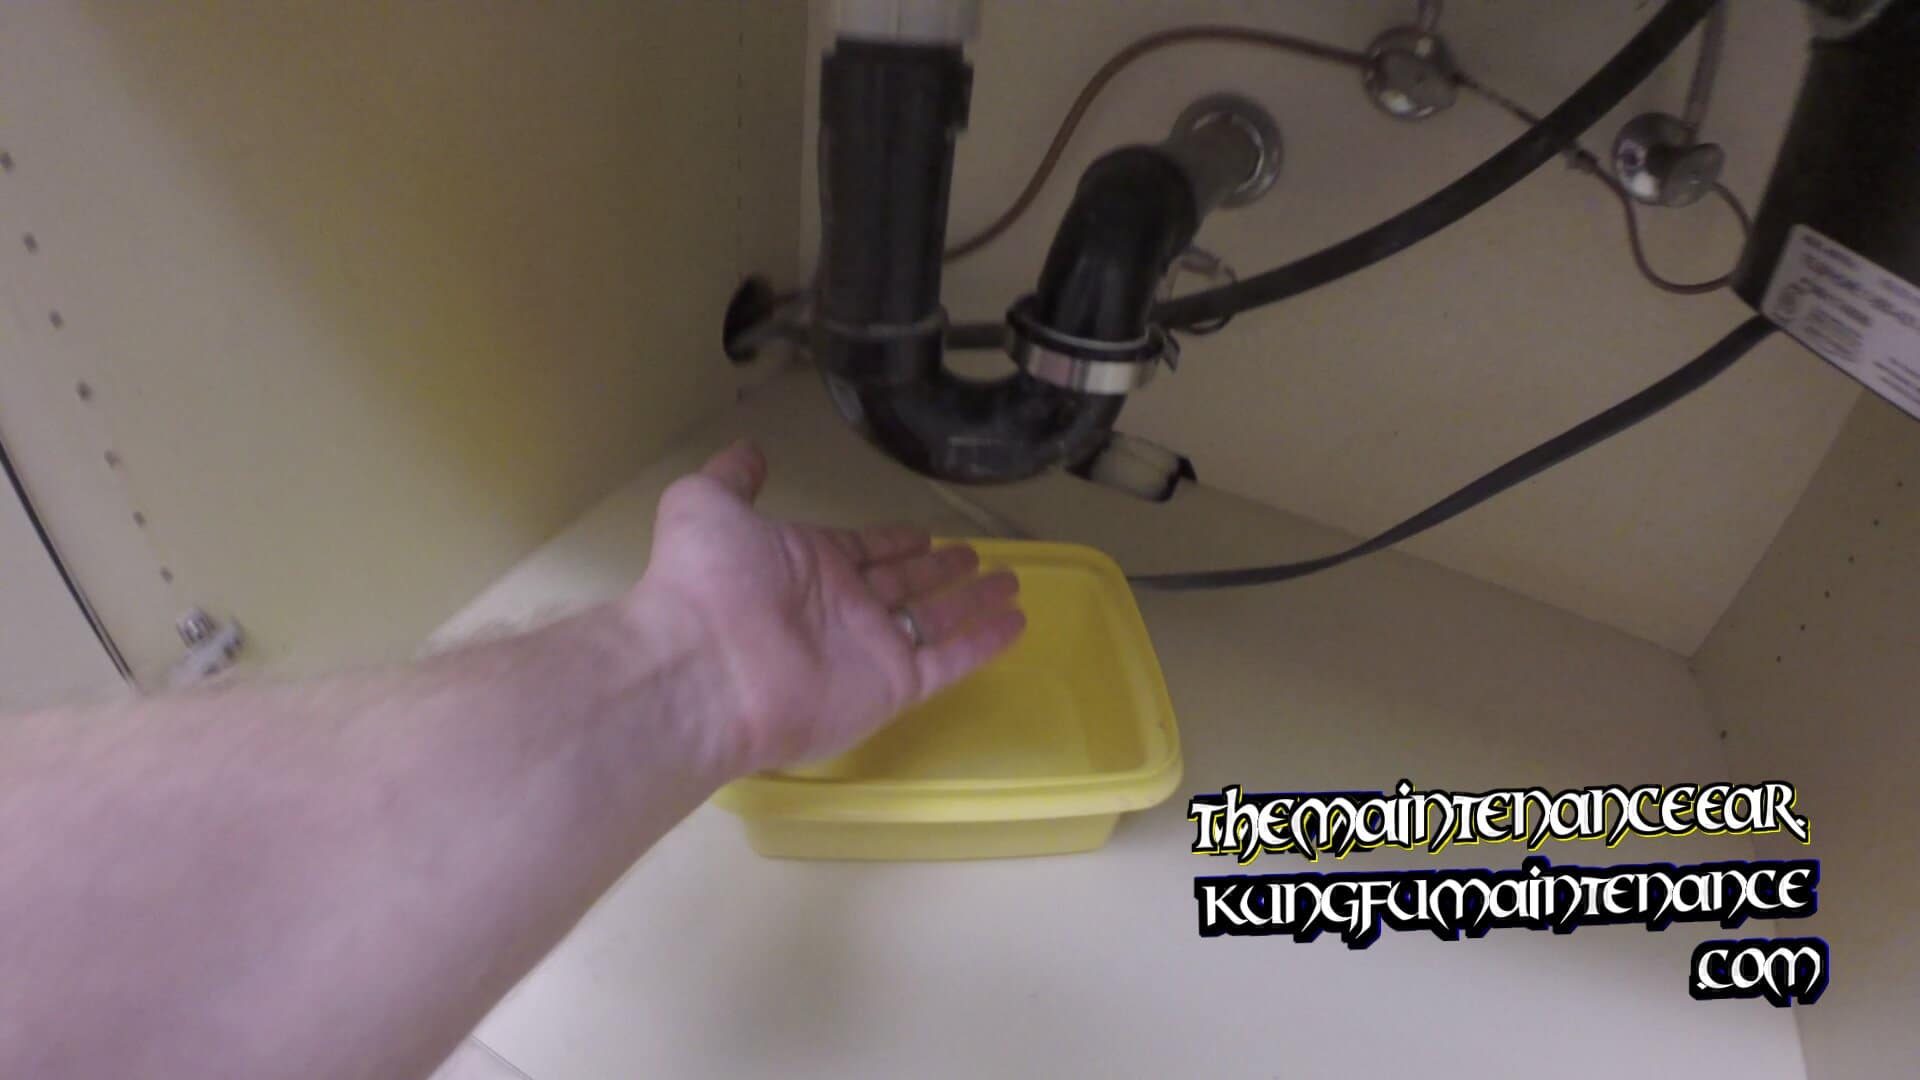
OK. So today I wanted to show you how to do the pressure test. This is a way to find and make any leaks that are in the sink drain plumbing show up pretty quickly.
Plumbing Leak Pressure Test
Had a repair done here where the coupling snapped and put a clamp on here to make it hold it all together but want to prove that that’s actually going to hold it. Make sure. So what we are going to do is force the water through very quickly. Went ahead and put the plug drain in. Fill up the water in the sink. Turn on the disposer and than pull the plug and than we will watch down below for any leaks. This will make any, even the smallest leak show up. And we’re good there. No leaks.
Good to go. Anyway I just plugged the drain. Let it fill up. Turn the disposer on. Pull the plug and let it force the water through. We are good to go there. No leaks.
You can get all the parts supplies and more shown in the videos through me KungFuMaintenance website where I make a small commission on any items ordered through there.
This is one to show share or send to anyone who has property or units that sit empty for long periods of time.
OK. I got a model unit that stays empty for long long periods of time and every once in awhile we get this bad funky smell and it dawned on me what the smell was. It’s the traps. What happens is the unit stays empty for so long that eventually the water that goes into the trap. The p trap. I’ll show you here. Shaped like so. It leaves water in the reservoir and it blocks sewer gasses from coming back into the dwelling. Because this unit stays empty for so long the traps go dry and the smell comes back. That’s the story there.
Now this one hasn’t been on for a long time and this particular trap for the shower is actually shared by the toilet. So you listen here while I flush the toilet and what you are going to hear is the water from the toilet fill into the trap. Yep. That’s how dry the trap was. OK the toilet won’t actually fill the water in the showers trap as the toilet drains water into the larger plumbing stack and drains on down. The shower drains into the same plumbing stack. You could hear it loud and clear through the drain especially as there was no water in the trap to block the sound or the gasses. So that’s what is telling me what we got to do is fill that puppy up with water. So I am going to go ahead and use fresh water from the shower.
Anyway I will do this to the shower deal here as well as the tub in the other room. Everywhere else the water gets ran once in awhile the sinks. Because no one is using this unit the shower sits and runs dry and than we get a bad funky smell. And that’s the story there. Again this is one to show share or send to anyone who has property or units that sit empty or not in use for long periods of time as many people may actually be getting sick from this unawares. It didn’t dawn on me how big this problem actually might be when I was recording the video but on further reflection I realize there are so many situations where this may be happening in construction models for new construction apartments hotels office buildings stores wherehouses. You know any of these places this can be happening in where water isn’t being used regularly. Again the water in the trap may evaporate and you have a situation where the sewer gasses are going into the place and people are breathing that stuff in.
http://Blog.KungFuMaintenance.Com
http://KungFuMaintenance.Com
Get The Kung Fu Maintenance E Book Here
Alright. Had a huge plumbing leak. Major nightmare major fun with the old torchy torch underground but wanted to show you afterwards. I went and changed the aerators and let me show you why. See inside the aerator. What happens is sometimes soil from the line gets into these aerators and than just clogs everything up. You can see all the soil just blocking it. These particular aerators are 1.5 gallon per minute. So they already have you know a pretty low flow and all that sand in there just blocking it off restricted the flow quite a bit. So a good idea after a major plumbing repair if you suspect there is sand in the line. It’s a good idea to change out all the aerators and also to check inside the shower head screen. So that’s what I did.
I was able to clean out the shower head screen. You can actually clean out these aerators also but they are cheap enough. It is probably better to just replace them. But anyway with the shower heads I just was able to clean them out. Take them apart and clean out the screens and clean out at the flow restrictor. I have got shower heads with a wand so. So on the shower head I will show you on this side. This is where the flow restrictor is. You can clean this out and than where this attaches to the neck. That little screen there. You can pull that out and clean that out. That makes everything run nice and smooth. Much better water pressure. Not like that. Good to go.
http://Blog.KungFuMaintenance.Com
http://KungFuMaintenance.Com
Get The Kung Fu Maintenance E Book Here
OK. Details details details. I just one little thing I noticed here. This disposal plug should actually loop up and over the plumbing here. It just prevents the deal from getting wet. Sitting in any water down below or anything like that. If you did have a leak. Which I actually do. Uh oh. OK.
http://Blog.KungFuMaintenance.Com
http://KungFuMaintenance.Com
Get The Kung Fu Maintenance E Book Here
Kung Fu Maintenance discusses the role and function of the filter drier in the air conditioner system.
OK. This particular part here is called a filter drier. When these are installed on traditional split system AC unit there is an arrow that points this way to show that the gas is running through this way and on the low side the gas is coming back through this way on the low side to the compressor there.
Filter Drier Function
What the filter drier does is it removes moisture from the system. Again moisture is bad for a system. If there is moisture in the line it will mix with the refrigerant and it will turn into an acid that will corrode the system. A new unit comes with a filter drier installed on the unit inside. You can see it there a little different style. This one has got three filter driers on it which is good. Keeping the moisture out of the system. Also any little particles that go through inside the system a lot of times will get caught in the filter drier. Which is good.
Anytime the system is opened for any reason you know replacing an evaporator coil, replacing a compressor, anything that opens the freon plumbing, you always want to replace the filter drier. Another important point on these filter driers. They absorb moisture which I told you already they absorb moisture. You don’t want to leave these points open. Even I have seen companies go and install a filter drier solder the end on and leave the end open while they are waiting for the crane to come and install the unit. If you can leave a cap on the other end after you’ve soldered your line so that the filter drier doesn’t just absorb moisture from the air. Because that is what it does. It has got a deal inside that absorbs the moisture from the air so we don’t want to absorb moisture from the air early on. We want it to absorb moisture from inside the system if there is any. You know we always want to again replace the filter drier anytime the system is opened and vacuum down the system to boil off any moisture that’s in the system.
Kung Fu Maintenance Demonstrates how to install a pop up drain with silicone on a white cultured marble counter top. This method also works for stone, granite, or other porous materials.
Today I’ll be doing the silicone method of installing a popup drain for cultured marble, because sometimes, the putty might stain the cultured marble especially white cultured marble, and we don’t want that. Today, I’ll be using silicone instead.
First we’ve got our cap, the top portion of the popup. Around this, we’re going to put our silicone all the way around, just build it up nice and thick to make sure everything gets coated, like so. I’ve got the silicone on all the way around; we’re going to insert that into our drain. Then on the bottom, we’re going to feed our popup assembly. With the popup assembly, we’re going to want to coat the inner portions of the parts with the silicone also, this way it’s got it all in the threads. As we tighten this up together, everything gets siliconed up real good. In between both sides of the fittings, applying the silicone, as well as to the top threads, all the way around the inside. Then back to our cap that goes up top; we already put silicone around the outside. We’re going to put silicone around the inside also, that way when those threads get threaded in, they tighten up against that.
Insert that portion in the top and put our popup assembly up through the hole. Up top, we’re going to rotate this all the way on until it’s seated nice and strong. That’s about as far as I can go with that. [inaudible: 02:14] I’m not going to squeeze; I’m just going to hold it to make sure, and I’m rotating the bottom portion until that’s nice and set. Going back down below, what we need to do is make sure that the popup rod is facing towards the back. Now we can go ahead and tighten the net up, pulling down and turning it into place. Before I do that, I’m going to go ahead and put another bead of silicone around the inside of the top, pretty much all the way around, like so. We’re ready to tighten this up. It’s going to squeeze the silicone out of everywhere. Again, this is why you want several layers of gloves. In fact, I’m going to put on more because this way as it gets onto your gloves, you can just undo a layer if you need to. It makes clean- up a lot easier. Also when we go to remove the excess silicone, it makes that easier too.
We’re ready to tighten this up; again, making sure the popup is towards the back. Eventually, we’ll reach a point where we’re tight. I’m going to go ahead and remove a layer of gloves so I don’t get the silicone all over my channel locks. I can use my channel locks to tighten this down the rest of the way. This should be done until its 1/4 -turn past tight. If you have two pairs of channel locks, you can use one pair to hold the bottom. There is another way: You could take your screwdriver and insert that in here, and then use that to hold. Just be careful because this particular one’s made out of plastic so we don’t want to crack it. We’re nice and tight.
On the bottom, you’ll want to take your gloves and go all the way around, and just smooth this silicone in so that you’ve got a nice, even spread all the way around. On top, just take all the excess silicone out of here. We might have squeezed out through the top. At the bottom, going to put another little bead of silicone just around the bottom thread and then smooth that in with a glove so that it’s nice and even all the way around. We can remove the popup rod nut in order to lock it in there a little bit better behind it. That’s all siliconed in. Put my nut back on just loosely so we don’t lose it. We’ll let that all dry.
Come back up top. Again, I’m going to remove another layer of gloves. Down inside here, we’re going to want to smooth in the rest of the excess silicone to get rid of that. You don’t want it slowing our drain down. There we go. We can go ahead and remove the blue protective cover; just getting back under it a little bit. Go ahead and get rid of my gloves. Then maybe you take a rag and clean this up or maybe the gloves. Take a rag for this one. Here we go. It might have been a better idea to take off the blue protective film before, that way it doesn’t leave any residue down in here. This is stuff is going to be a little tough to get out. Always learning more. That looks good. We’ll let that dry, come back and put it back together, and test it out.
Here goes the rest of the popup install. Going to take the rod and put it down here in the back and down in the drain. Going to insert that popup plug and hold it about here, making sure that the bottom hole is facing towards the back, like so. Then underneath, you’re going to take your rod and then slip the back on. You’re going to feel with your other hand the popup plug and insert the popup rod into the plug so that you’re able to move the plug up and down, like so. Once you get there, then you’re able to thread the nut on, taking care not to get it cross-fitted. Just tighten it down finger-tight; don’t want to over-tighten it.
Next, you’re going to take the extension, undo the thumbscrew enough so that you’ll be able to pass the rod down through the 2 holes, and then you’re going to tighten the thumbscrew against the rod. What you’re going to do is line up the holes to the back where you want it to go. What you want to do up top is just raise the post up to about so. Hold that with one hand. Here is inserting the rod on the clip. We haven’t put the clip on yet, but tighten the thumbscrew down first. Once the thumbscrew’s nice and snug, now we can take your clip, and we’re going to push this back and feed one end of the clip on the other end around, squeeze both of them, and pass it on to the rod. Hopefully you were able to see that. We put one end of the clip on, then the rod, then the extension, then the other end of the clip on, like so, just by squeezing it. Now we’re able to control our popup with the rod.
Now is going to be putting the trap back together. First, we’re going to slip the slip-joint plumbing over the popup assembly, and then slip the track up and over that. Then on the bottom of the track, we’re going to lift up and tighten this up. We just hand-tighten this until it’s tight. We’re nice and tight. Next, we’re going to use our slip-joint plumbing and tighten this down. Again, just hand-tighten nice and tight. We’re ready for the leak test.
Leak testing the popup and drain line: What we want to do is go ahead and pull the plug, fill the sink up with water, and this way we’ll do our pressure test. Fill it all the way up then we’ll pull the plug, and then we’ll check for any leaks down below as the weight of the water rushes through the lines. Before we get to that point, we can go ahead and feel all around for any leaks. So far, we’re good. This overflow works as a relief to let the air in, like the old can used to do. When you open a can and you puncture one side and then you puncture the other opposite side so that your contents would flow out easier; it’s the same principle. Water’s going down the overflow now. Let’s go down here and check it out. I’m going to go ahead and pull the popup. We can do it up top or we can go ahead and release it here. You hear the water going through. Again, we’re checking and feeling for any leaks, any signs of moisture, especially at any of the connections. Everything’s nice and dry.
Nice new popup. We can just pull the blue trim cover off which just peels off. It’s a protective covering. Everything is nice, shiny, and brand new. Good to go.
Kung Fu Maintenance shows changing out a broken garbage disposer video while explaining many of the different factors, an often missed step for longevity, to keep things working great, and converting from a threaded slip joint drain connection to a flanged tailpiece compression fitting.
I’ve got a garbage disposal leak, and showing how to replace it. This particular garbage disposal; I see these wear out tends to be a lot faster. There’s two different styles of garbage disposals: One where it’s got a threaded end like this. I seem to not have very much luck with these; they seem to leak a lot more and crack. The other kind of disposal has this end; I’ll show you how that gets hooked up.
We got to unplug our plug, undo our disposal drain line. Take this off carefully because usually there’s some water left in the line. We’re going to replace this piece, it’s what’s called the tailpiece. Looks like this instead; it’s got this flanged end that we can stick our rubber gasket against and link that through the disposal.
I usually use my knee to lift this up and then turn these locking plate out, and then move the disposal down, like so.
If our cord’s not in bad shape, we can reuse it. This one, the cord has already partly come out. Usually, this gets locked in underneath but it looks like someone didn’t bend the second tab out underneath this portion. Once you put this in, then you have to bend this tab out. For our purposes, it’s just going to make it easier to do a new one.
Looking at my cord, everything looks in good shape. No breaks in the insulation, so I can reuse this. Pop our top off. There’s our neutral, there’s the hot. It’s already a part. Now screw. That’s our new disposal. Since we’re hooking up a dishwasher line, we’ve got to known out this knockout. Just use my flat blade of my screwdriver and hammer, and knock this in. Make sure I retrieve my piece.
If you look inside the knockout hole hat we just did, you can see a ridge around the inside; these little burrs. What you want to do is take the flat bade knife and just rotate it inside and take that edge off so that it doesn’t leave a place for food to hang out. This is an often cause of the disposal drain line being clogged. One more little burr. Nice and clear now. Then we’re going to pick up our pigtail, take off our access plate, our ground screw.
When you’re facing the outlet, the hot is on the right side, generally. You can follow the right side of the cord all the way back to here. This one’s going to be my hot. We’re going to feed the wires into our disposal port. I’m just going to hookup my hot so we don’t forget which one’s where. Twist these together a little bit. We’re going to use our wire connector. Here’s our neutral, our ground.
Hookup our ground, and then I’ll show you how this deal fits in. I’m going to turn it this way so that we have access to the prong that’s not bent yet. We put the bent end in first, and then push this side in, like so. Then we’re going to insert our screwdriver in underneath here, and then the tab out so that we lock it into place, like so. That protects the wire from rubbing against the sharp edge of the sheet metal. Here’s our plate. We’re ready for action.
Back to our plumbing deal. We can’t use this end. We might get away with it for a couple days, but eventually, it’s going to leak. What we need to do is convert it to our tailpiece, which is right here. We need this flanged end out. Just remove this side. We’re going to use these on this end. We can slip this on and then we can jump this part, this rubber gasket. It’s important; we want the gasket to seat up against the edge of the tailpiece flange. We’re going to slide our deal here, like so. We may have to trim this end a little bit depending on the space that we have for the disposal. There we go. We’re going to slide that on there.
Once again, I’m going to use my knee to lift the disposer up and lock it into place. Sometimes I can just lift it with my hand. Sometimes I just use my knee underneath it to hold it; that way I got two hands free. I can also if I need to. We rotate these pieces in. Sometimes if these are really stuck, if you’re trying to take it off, you can insert your screwdriver into these parts and pull it over. I find usually I’m able to just undo it. I’m going to re-hook my disposer line. I should peek in here that this is clear; there’s not a whole bunch of gunk and stuff in. Here, you don’t want to tighten this clamp down too tight; just nice and snug, 1/4 -turn past tight is good. The reason being, the seam for the disposer goes right through the middle of the disposer drain line port, and if you tighten this down too much, you can crack it.
For our tailpiece, see how it fits in. Looks like we’re going to need to trim just a hair off maybe. Let’s see. No, we’re going to be okay. This side’s just nice and easy: Slip joint plumbing tightens the beveled washer inside there to seal the ends, and this side uses a compression fitting. They’re both compression fittings, but you get the idea. We’ll just tighten these up nice and easy. Then when we go to plug our cord in, we want to get it off the ground so we want to loop it over the drain line; that way it’s not hanging in water or anything like that. There we go. Clean up my mess down here. We’re ready to test it out.
We can field test it for any leaks. Beautiful; no leaks. The better way of testing is to do what’s called a pressure test. Just take your plug and plug the drain line. Let the sink fill up, turn the disposer on, and then pull the drain plug. That’ll force the water through extra-fast. Even any little pinhole leak will show up so we can prove that we don’t have any leaks down here. Turn on the disposal. We’re all set. Good to go.
Kung Fu Maintenance demonstrates how to remove and replace a water leaking kitchen sink drain.
Today I have got a leaking strainer basket. It’s leaking from right here. It’s cracked and leaking. Let me show you how to replace one of these. I’m going to using a little bit different style to replace it with. I just want to make sure the profile is close enough to work in length and this appears that it will be. It’s going to come up a little bit but we should have enough with the slip joint plumbing to be able to adjust it and make it fit.
I’m removing the old one. I’ve got these three screws here and this loosens the top bracket. This presses the gasket against the sink basin. Let’s pull all this up. Move our disposal cord out of the way here. OK. All right. And then we’re going to remove the bottom out of here. Top portion. OK. And we still got our washer in there which is fine because we’ll need it for the new one. So now it’s just a matter of removing all this here. OK. OK. Well, one way to get it off. All right. OK.
Anyway, it is a good idea to wear gloves especially when working with the plumber’s putty as the plumber’s putty can be kind of stinky. This way when you go to eat lunch, your sandwich doesn’t wind up tasting like plumber’s putty because I could tell you it’s not a good taste. This part should unscrew. Now the plumber’s putty is falling down. OK. Nasty stuff. And some more.
There we go. Separated that. That just sat under cup. Man is that nasty or what? All right. So now we just push the old one out.
Now in our new kit, we want to separate of all this portion. And it does have handy instructions one the bottom anyway. And this trim plate and the gasket go on the bottom portion, so the top portion just passes through and seats. And I’ll undo all this twisty tie to pull out the strainer basket and get this thing going here. And it’s got its own collar nut. For the collar nut portion, this and this here, and slide the slip joint plumbing up and off out here so that we can replace this collar nut with this one here. OK. This little piece goes inside the top here and this piece slides on to the bottom. And then this part slides on here like so. And now it’s ready for assembly, but we don’t want to get too crazy with it until we’re ready there, OK. The rest of it is on the bottom here. What we can do is go ahead and get this ready– is this seal plate and the gasket goes on the bottom here. So now we’re ready and we’ll go up top.
OK, up top here we got our draining opening. And again here’s our new basket. OK and what we want to do is put plumber’s putty around the inside here. First we’ll clean this off so we have a nice clean area to meet here. Let me get my gloves going here because this plumber’s putty is smelly stuff. If you got any old junky stuff it’s probably a good idea to go ahead and get rid of the contaminant stuff here. We want nice fresh, clean plumber’s putty. What you want to do is roll it like Play-Doh in a circle. And we want to make a circle all the way around this here and kind of press it into place so that there is not going to be any chance of any spot getting missed because once this presses into place it’s going to squeeze everything out and seal between the two. This metal and the plastic. Now that that’s in place, we don’t want to get any on the threads here– on any of these threads. We just want to seat like so.
So now we’re ready on the bottom portion, and what you need is a screwdriver or something that you can stick down in the slot there to keep it from turning. I’m going to use my Leatherman because it’s got a bigger screwdriver– fatter screwdriver than my screwdriver. So anyway, a nice big screwdriver here. I’ll just insert that in a slot and use that to keep it from turning.
Now I’ll come back to the bottom. We already got our trim plate and gasket here and ring ready to go here. So we slide these up to the top and then just carefully thread this on making sure it’s not cross threaded and then just spin it into place. Up top it’s going to start to squeeze the plumber’s putty out as we tighten this down. And then we just tighten it securely, this quarter turn. That’s tight. Make sure this is on there. And you ought to look at your gasket to try and make sure it’s pretty much even all the way around. There we go. OK. Now I’ll get my Leatherman back.
Now on the bottom portion, you’re going to slide this up to meet, and you can see this part is too short. It’s not going to reach all the way. We’ll tighten this portion on. And this we’ll just hand tighten it. It’s nice and snug. Then on the bottom, that’s what we’re going to have to do– is loosen this portion here and hopefully this has enough room to slide up a bit more onto here. Just loosen this and this is usually hand tightened. It looks like someone’s tightened it a little bit more. Going to loosen this up. This particular fitting up top has a beveled washer where as this had a flat washer like this. Where it’s got different types of washer. This particular nut here that I’m twisting has the washer built into itself. But anyway you can see we have enough room now to slide this portion up more. So we’ll use this down at the bottom and we can tighten it down here and now we’ll have enough. Our pipe will be extended enough. Again always take care not to get cross threaded. This is just difficult slip joint plumbing and it generally only needs to be hand tightened. OK. There we go.
OK, so we got everything hand tightened now, and now we’re ready to leak test it. But before we do that what we want to do is come up here and just remove any of the excess putty from the top here. We’re just going to pull this out all the way around. And as long as this is clean, we can put it back in our plumber’s putty bucket. If it’s got any kind of contaminants or anything just throw it away. It’ll be better off. And if there’s any doubt, just throw it away. Plumber’s putty is only like $1.00, $1.15 for little bucket so no biggie.
So before I make it perfect I’m going to go ahead and just run the water and leak test it here. Look for any leaks down below. And at this point it’s a good point to go ahead and field test it. Your hand’s a little more sensitive than just doing it by eye. Sometimes you can’t see that well. All right and it seems to be holding good, so now what we want to do is pressure test it. And the way we pressure test it is to put our sink basket in or plunger. And this particular model actually came with its own sink drainer basket. I guess it’s holding the water so enough for the pressure test. We’ll fill it up about a quarter to half way. Somewhere around there. And then go ahead and pull the plug while checking down below. I’m going to go ahead and pull the plug and that’ll force the water through a lot faster. And it appears that we’re good here. No leaks. Nothing dripping.
Now we’re going to go ahead and clean it up up here. We’ll go ahead and pull all the blue trim off. A nice, shiny brand-new deal here. And then we want to cleanup all this excess plumber’s putty. So we want it to just do its job but be invisible. And we don’t want it to get in anybody’s rag or anything like that when they’re going to clean so I’ll just take my screwdriver and rotate it around the inside lip, just to take off all that excess stuff here. All right.
And then, now we’ll go ahead and pressure test it again. And this time I’ll use the actual strainer that came with the basket. And this just goes in only in one way, and usually it sits like this and you get most of your food chunks out. And if you want to plug the drain just turn it in like so. And now we’re going to go ahead and fill it again and retest it. And as it fills with water, we’re going to check all around here and all down here to make sure that we don’t have any leaks showing up. You’d rather do this once then have to come back and do it again. That’s a mess with the wet cabinets and all. It seems like we’re holding good here though. We’ll just go about halfway full and then go ahead and pull your plug. And we’ll check for any leaks down here. And it looks like we’re good. Nope, no leaks. Everything’s nice and clear and no leaks showing up, so we’re all set there. Job complete. That’s how you replace a sink basket. Good to go. Nice and shiny. Nice and new. All set.
Kung Fu Maintenance demonstrates how to run new dryer vent or replace old air leaking hose in super tight quarters.
OK, today I’m going to be running a dryer vent from the top here, onto here.
Looks pretty impossible, doesn’t it?
I’ll show you again how it is actually possible.
OK. Well you’ll have to check your particular codes for your particular area. For me, this is all that fits here.
What I have is some foil tape for this that’s rated for heat use. For heater use that has a high temperature. So you want to make sure you’re not using a type of tape that might start on fire. I’m going to remove all my old tape there.
This is for an electric dryer. I kind of like electric in a lot of ways. Gas you’ve got more possibilities of carbon monoxide poisoning, and all that. It’s more critical that things are correct. We want things correctly anyway.
Here we go. So connecting the top part’s straightforward. We’re going to slide that. OK, so this part’s easy and straightforward. It’s just going to go straight on there.
The tricky part is getting up here, either with a ladder. What I’ll do is, I just put my feet on each end. Basically step up there, and stand in there. And before I do that, I’ll tear off a piece of my tape to get it ready. And pre-peel a little bit from the backing.
And this is the nice thicker tape. A little bit wider. It’s nice to have one really good seal on there.
So now stepping up to the deal here. And this is [INAUDIBLE].
OK. Up and in. Now I’ll just grab to the back.
OK. And I know putting these on sometimes can be just a little bit tricky. Tricky, tricky.
This is practically a flashlight video right here. Welcome to the top of a washing machine and dryer. The laundry center, with Kung Fu maintenance in this corner, versus the dryer. Pretty sure I’m going to win, but you never know. The thing might try to knock me off.
There we go. And we’ll leave plenty of room there. And we’re ready to tape it off. You can see a little tiny tear there. We’ll make sure we get that also.
But the first run definitely more concerned with getting a half-and-half seal between the vent itself. And you can see how I’m pulling the back paper off of the tape. Anyway. Giving that half-and-half seal over the vent, we’re really going to squeeze all that tape down. Make sure everything’s nice and good there. And I’ll probably to do another round of tape while I’m up here.
I’m just going to pull off enough. I might do two rounds here, just because.
OK, let’s get started here. Come on, buddy. Come on legs, don’t fail me now. Come on tape, cooperate. Who’s side are you on, anyway? Are you rooting for the dryer? You should, because you’re going to be there for a long time. Just do your job. There we go. OK. Beautiful.
OK, for sure that’s going to hold perfectly now. It’s overlapped. And where that tear was, I’m just going to strengthen that up and overlap. This is why we’ve got a solid and secure seal. And beautiful, I might add. For the top. Here we go.
Now I can get down from here. Whoa, not like that. Don’t try this at home, or at work. There we go.
I’m down, I’m free. OK.
Now, to show you how we do this. Get rid of all my paper there.
OK. Basically, as you can tell, there is not enough room to go down the side here. So what we have to do is go at an angle. The way we’re going to do this, is we’re going to pull as much of the hose there, nice and sideways. And then right here we’re going to angle this down, and bring it down the side. And definitely easier said than done. I have a little bit that I can tip the dryer a little bit, and that’s fine.
As you can see, slinky-style. Slinky, slinky. I’m going to bring it down slinky-style. There we go. Come on, slinky. Slinky, come on. OK. And taking care not to crush the vent, just pulling it down, little by little. And you can see how I’m undoing it here. And moving that all the way to the back, where we want it. OK.
And the critical spot is when we go through the hole, because that has sharp edges. It’s unfinished metal. So be real careful there. What you can see is we’ve opened the line. Now we’ve got a nice solid line going all the way through.
Now on this side you’ll see us coming through. Come on through, buddy. Pass that through. And being very, very gentle. We don’t want that stuff to slice. If it slices through there, it’s going to be a very difficult repair.
We’ll bring this right to a vent. And we’ll see if we have some more that we can bring on down, and give us a little more wiggle room. Come on down, just like so. And just evenly spreading the love. OK.
We’ll bring it on through. Nice and gentle. The key is not putting too much pressure there. And we’ll slip it on over.
Now some places call for rigid plumbing, so you may have to do that in your area, in your situation. It just depends. This I’ve found is the way to fit, and the way to go.
In ten years I finally had a problem. But then I’ve found a lot of these that weren’t connected properly. So I had to redo them and connect it properly.
To make a good seal, as long as this seal’s good, it just keeps everything going good, and prevents lint from building up inside the controls and everything. It just really preserves the life of the system. If you’re getting a slow dryer, it’s definitely worth having a peek back here. Looking at what you’ve got going on for your venting.
And also you might check where it exits the building. Make sure everything’s clear there. As you can see, sometimes these are a little tricky. Getting them to come up and over. The inset, there we go, and that’s going to be beautiful.
OK, now it’s foil-taping time. Undo enough to make a complete circle, a little bit of an overlap. And that first one, it’s critical to go half-and-half over the elbow, as well as over the tape.
OK, and then we’ll smooth that all on. And you want everything nice and clean here. You could see this one was already nice and clean. If it’s not, you may want to clean it up first so that you have a good, adhering surface to stick to. Because if that is all dusty, and it only sticks to the dust, it’s going to come off after using the heater for some time.
Now personally, I like to tape up all of these elbow joints. This does allow rotation. You can see how that can rotate. That’s fine, but once it’s in place we really don’t need it to rotate anymore. And I really like to tape these in place, just because a lot of times when you turn the dryer on– I’ll even do that now, turn the dryer on– you’ll see sometimes a puff of dust just come flying out of there. Out of these unions, where the turns are. And this one’s actually OK.
Oops, I’ve got my old dryer vent in the dryer. That wasn’t good. Oh well. OK.
I’m going to have get rid of the old dryer vent. It had split, right there, where it goes through. So I probably needed a new one here. Put down a major remodel here. Anyway, to make a long story short, everything’s going to be nice and brand new here. Anyway.
This is just going to make it that much more efficient, not having any air openings right here. One other thing to watch for is to make sure that these screws up top, right where it goes in, are nice and tight. These do come loose sometimes from vibration. But mine are nice and tight there. OK.
And I’m going to have to pull that dryer hose out of there in a minute, just for testing purposes. Even though I did run it inside there already, that wasn’t really a good– not a good thing to do. But we’ll survive.
You know, if you don’t get things right, or do things right, the first time, it’s going to punish you later. It’s going to attack. Alright. We’ve got it on there, now ready to test it for any air leaks. OK. And I’m going to go ahead and pull out that dryer vent. We don’t want it to get dust and stuff all over inside there. It’s definitely full of some gnarly lint there. OK.
And the other items are laundry items, so I’m not worried about that.
Definitely a good idea to clean out the lint filter catch back here once in awhile. It’s got the kidney-shaped deal that pulls out, and you can separate the two halves of this. And if we’re good, we clean all that stuff out once in a while, too. Which I’ll need to do. Don’t want to run my flashlight in there.
OK, anyway. Close it up, and start it, and now we’re just going to feel for any air leaks. And this should just be pushing the air out of there. Ah, beautiful.
No leaks, and we’re sure. Sure, no leaks, just feeling around. Alright. And everything’s good.
One other thing, with these dryers, it’s good to let them breathe. If you have doors that close, it’s a good idea to have louvred doors. If you don’t, and you want to have your stuff dry faster, you might want to leave the doors open while the dryer’s running, so it can pull air in there.
It’s not critical, but you’re going to have to use your judgment. It’s one or the other. If you close it up, you’re minimizing the sound, but you’re lowering the speed that stuff is going to dry. If you open it up, you’re going to hear a little more, but it’s going to speed up your drying. And save you a little energy.
The alternative would be adding some type of louvred doors. Anyway, good to go. That’s how to put the dryer vents on. Nice and neat. Good to go.