New Product Cover Free To Save Energy Money And Time Heating Pools And Spas


There is a new product on the market called Cover Free. It is an engineered patented formula that creates a thin layer on the surface of the water that lowers your heating and chemical costs by minimizing evaporation and water loss due to evaporation. It is easily added to the pool or spa by pouring it directly in the water or adding it to the skimmer. The manufacturer recommends adding 4 oz per week for every 675 square feet of surface area.

Cover Free creates an invisible cover that may be even more effective than traditional covers without all the hassles. Traditional covers pose a number of problems. First they must be rated to support a certain amount of weight. Second they must be removed in order to enjoy the pool or spa. Third they lose their benefits when removed. And fourth they create the possibility of someone or their pets becoming entrapped underneath them.

Cover Free creates a nearly imperceptible cover on the surface of the water. It presses out of the way when someone jumps in the water and springs back into place to maintain the integrity of the shield. Usually about ninety five percent of heat energy is lost. Most heat lost (about one half) occurs through evaporation from the surface of the water. All of that water lost must be replaced and water retreated so there should be significant savings in water, heat, and chemicals needed to keep water balanced, heated, and disinfected.

 

Posted by Kung Fu Maintenance in The KFM Blog, Tips, 0 comments

Kung Fu Maintenance E Book Free Through Sunday

The Kung Fu Maintenance E Book is ready and you can get it for free until Monday (Through Sunday March 25th,2012) ($2.99 thereafter). Any help you can give on spreading the word about it would be greatly appreciated. Kung Fu Maintenance explains how to repair the most likely items you will need to repair in your lifetime.
If you could like it on Amazon that would be awesome. Any promotional help you could give would be greatly appreciated.
I have been working on the book on and off for about ten years. Hope the book serves you well.

James K.
Kung Fu Maintenance
Get The Kung Fu Maintenance EBook Free Till Monday

Link to Get The Free Ebook

http://www.amazon.com/Kung-Fu-Maintenance-ebook/dp/B007KQFI3Q/ref=tmm_kin_title_0?ie=UTF8&m=AG56TWVU5XWC2

Posted by Kung Fu Maintenance in The KFM Blog, 0 comments

How To Convert Vertical Blinds From Cord And Chain To A Wand

If you have corded vertical blinds that have a centered master control gear running through the center of the gear channels than the blinds can be converted. All you need is a master wand control, a wand, and about fifteen minutes spare time to make the change. First loosen and remove both end brackets. Next remove the gear mechanisms from inside the end caps (usually held in place by a keeper). Discard the inner gears and blind chain. Behind the blind gears opposite of the corded end you will find the cord is knotted or split weight clipped. Cut off the knots or split weights and remove the entire cord. (Watching the youtube video I made on this will help you better understand the steps involved.)

Next find the keeper and make sure it is installed in the proper place just in front of what will be the very last slat. If it is in the wrong place remove it and install it in the proper place. If the blind slats are curved the convex portion should go to the back. Next install the rear end bracket. Now slip off any guides in the way of the first stem control and remove about the first four slats to give better access. Next slide out the main gear a bit and some of the blind stem controls enough for you to use your screwdriver more easily.

The new master control will have two screws that pass through it linking it to a stem control. Remove the two screws and discard the stemless stem control. Next slide the master wand control onto the main gear, screw holes facing towards the blinds. Next slide the first stem control up against the master control and use the two screws to link the first stem control to it. Now re-install the guides previously removed and reattach the end cap.

Attach the blind wand, reinstall your four slats and your ready to test the blinds for proper rotation. If you can’t get a full rotation you may need to pop each stem over a couple points. I will try to cover this better in a future video so subscribe to my Youtube channel if you want to be one of the first people to see that video (your subscribing helps support and encourage me to make more videos and write more blogs).

As I have mentioned before do be careful as the blind head rail is very sharp unfinished metal and cuts flesh just a bit to easily. The video on Stems and Gears should help a bit in understanding the way vertical blinds work.

~ I Wish You Great Success ~
~ Kung Fu Maintenance ~

Posted by Kung Fu Maintenance in The KFM Blog, Tips, 0 comments

Rustoleum Countertops and Cabinet Refinishing Contest

Have you seen these new countertop and cabinet refinishing products from rustoleum? I would whistle but I don’t know how to write it so you could read it. They do look nice in the adverbs. I am wondering how they hold up. I have to say rustoleum products have been very good, to me in the past. They have done as much or better than I expected at times.
Their reputation is very good and I don’t think they would risk it for the small bit of money they make in extra countertop and cabinet paint.

I have yet to see anybodies countertop refinishing products hold up perfectly. I am in favor of something like this that is regularly available so that touch ups are possible for us maintainers.

They have specialized paints for countertops and for cabinets. I have been searching sometime for these types of products. I must say I will step back and wait and listen for how this holds up but it looks so good. I would really like to try it.
Well they are running a contest for what you can do with their products to upgrade a kitchen. I have put the link below so that you can check it out. The grand prize is a five thousand dollar gift card.


If you try it, Please let me know how it works and holds up for you. Make some noise. Holler at me now, and, or, five, ten, tweny , one hundred, or more years from now. Yell at me about the first scratch, blemish, or burn mark. I just want to hear about it in the comment reply section below.

Contest terms can be found here.

http://rustoleumtransformations.com/contest/contest-terms.php

Looks like you will have to hurry as the contest ends at 11:59 pm ET on 9/30/2011
That leaves you just under two months from the time of this posting to get it done. Happy painting! I So Hope You Win! But more than that, I hope you like your new kitchen! (or bathroom if you don’t care about the contest!) Give me a shout if you do! Give me a grumble if you don’t!

Glad you are out there,

Just like me,

Kung Fu Maintenance

P.S. I would still like to hear from you about this product long after the contest ends so make some noise even if this post should find you in the far future.

Don’t forget to Hollerrrrrrrrrrrrrr! And Google + me 2! Thank You!

Posted by Kung Fu Maintenance in The KFM Blog, Tips, 0 comments

How to Repair Just About Any Stripped Screw Holes

Who hasn’t crossed paths with a stripped screw hole? You go to tighten the screw and it just turns in the hole but no righty tighty and maybe too much lefty loosey. A quick trick here is to fill the hole with a sliver or two of wood, plastic, matchsticks (minus the heads, so you don’t start a fire) , toothpicks, or even a rolled up bit of paper. This will give the screw something to bite on and help it to grab into the hole. You can either cut off or roll up appropriately guestimated sizes and amount of wood slivers or use rolled up paper and insert it into the hole then anchor your screw in the modified hole.

Now I wouldn’t recommend this repair for fixing planes, trains, or automobiles, but it works just fine on light duty applications such as cabinet pulls or interior door jambs. It can also work in some instances where the proper screw was lost you can use the wood and a smaller sized screw to anchor into the old hole. You may need to use a washer if your screw head is a different size. If you are concerned about longevity of the repair you might add a bit of wood glue to your inserted tree mixture and let it dry, if need be, and then screw in the screw.

Most screws are all about plane leverage. The screw threads grab into the material anchoring into the weaker spaces between material particles forcing the remaining weaker particles closer together thereby making them denser, more concentrated, and better to anchor to. The correct screw is particularly engineered at the proper angles and thread size for the material it is designed to anchor to for optimum holding power. Some materials including some types of wood need to be pre drilled to avoid splitting of the material.Each material is different in it’s density and tensile strength. Wooden matchsticks, toothpicks, and rolled up bits of strong paper are very flexible and still strong enough to fill voids, this is why they work well for this application, making them anchor into the existing subtances and create holding power.

This same effect works well in reverse the same plane leverage helps the screw to be easily turned out and removed for repairs or modifications. If you had to take apart something where this repair was done you may need to repeat the insert of some material if it had not been glued in.

~~~ Stay Strong ~~~
~~~ Kung Fu Maintenance ~~~~~~~

Posted by Kung Fu Maintenance in The KFM Blog, Tips, 1 comment

Procedures For Charging an A.C. to Prevent Getting Moisture In System

~~~~~~~~~~~~~~~ Danger High Voltage!~~~~~~~~~~~~~~~~~~~~~~

~~~~You must be EPA certified to perform these repairs.~~~~~~~~~

~~~~~~~~~~~~Always wear gloves when handling~~~~~~~~~~~~~~~
~~~~~~~~~~~~~refrigerants to prevent frostbite.~~~~~~~~~~~~~~~~

~~~~~~~~~~~~Always use quick connect fittings.~~~~~~~~~~~~~~~~

High and Low Side Hook Up at Service Ports

High and Low Side Quick Connected

If you have an air conditioner that is not cooling, first prove that the compressor is running. Touch the low (also called the liquid or suction) side line coming from the compressor. If it is not cold to the touch, this is a sign that the A.C. unit is low on refrigerant.
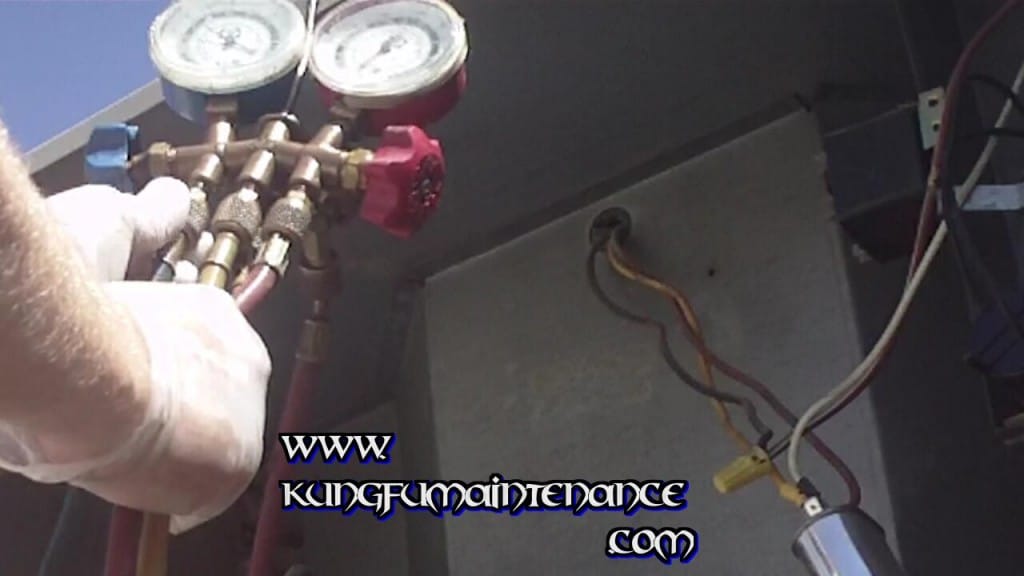
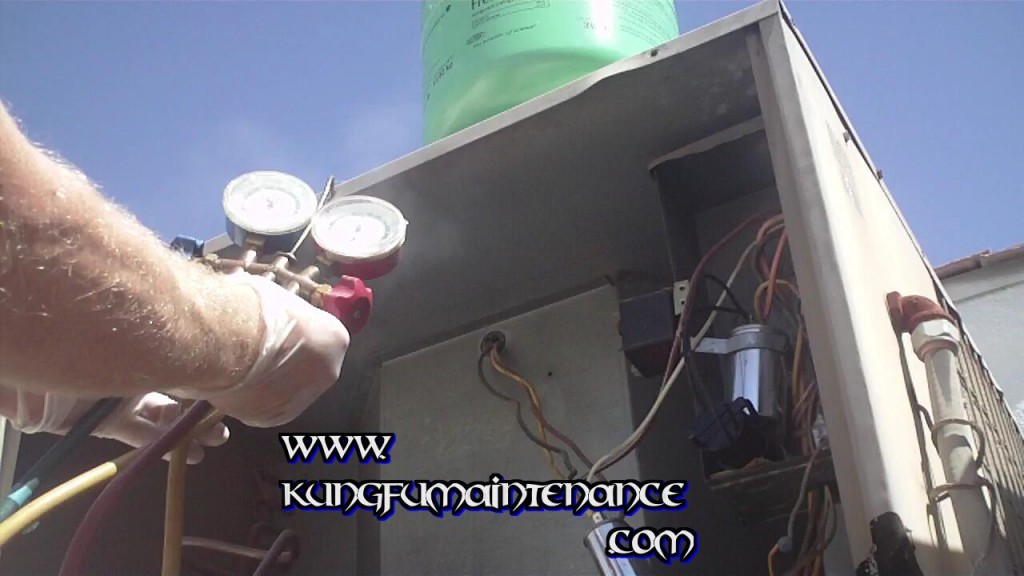
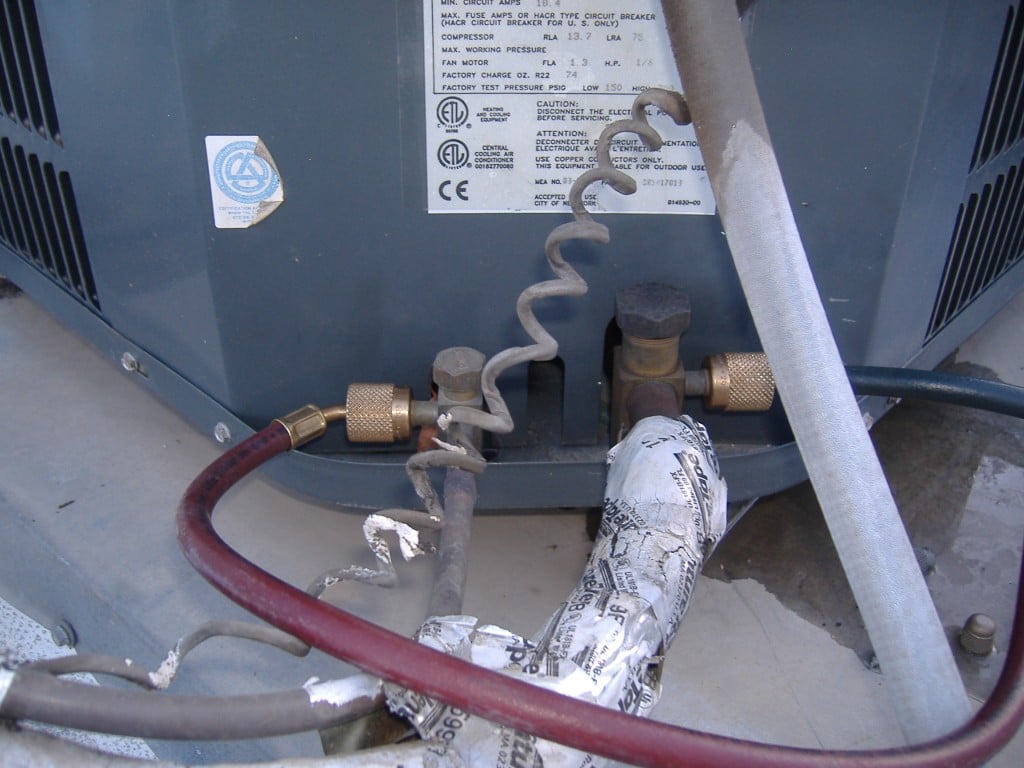
To charge the A.C. system, first calibrate your gauges. (To be safer you can pull the disconnect, and discharge the capacitor before setting up gauges. To check the unit pressures and add refrigerant you will need to turn the unit back on.) Prove that the hand valves are turned off. Next remove the suction line schrader valve cap for the low side and hook up your blue cool side line to the port with your quick connect. Next crack the blue side service valve below your dials to purge any air from the line. This is called a “deminimus release” it uses the refrigerant to force the air from the line purging the air containing moisture from the hoses. Air contains moisture and if it let into the unit will mix with the refrigerant gas and turn into acid causing leaks and reaking havoc on the system.

Low Side Deminimus Release

Cracking the Low Side Service Valve

Repeat the same process for the high side. Attach the red gas side line to the high side port and purge the air from the line by cracking the line at the service valve again using a tiny bit of the refrigerant to force the air out of the hose.
Next hook up the yellow service valve hose to your refrigerant bottle with the service line quick connect. Keep the can valve side up for vapor charging (except for very specialized applications) thereby avoiding putting liquid in the plumbing to prevent liquid slugging of the compressor pistons and premature compressor failure that would be like an air conditioner heart attack. Open the refrigerant can valve and purge the service hose by cracking the yellow line service valve for a quick second.

Deminimus Release

Deminimus Release

Your gauges (If in good working order and calibrated) will now give you a good show of what is in the system. The outer rings on the gauges show PSI( pounds per square inch) and the inner colored dials show the pressures for accordingly colored types of refrigerants. (Each type of gas has a different temperature pressure relationship but I will save getting into that for another time.) For example, green is for r22(Right now, arguably the most widely used freon (Soon to be phased out according to the Montreal Protocol, (check my blogs on Isceon).

Now you are ready to charge the unit. Open the blue side service handle and you will hear the refrigerant being sucked into the system. I f you are charging R-22 what you wan’t is ambient temperature plus thirty degrees on the high side. If the temperature is eighty five degrees outside then you will be looking for one hundred fifteen on the green r22 high side dial. Each system is a little different so this is only a very basic example.

One method of proving good pressures is measuring the temperature at the evaporator coil. The ideal temperature for the evaporator for most freons is forty degrees. Another method is to check the temperatures with thermometers for a fifteen to twenty degree split between the air going into the intake vent and the air coming out of a distribution register.

Each set up is a bit different. This is only a very basic example, with a few apps for measuring good refrigerant charge, not so much rules. You must digest the information in relation to the specifics of your particular components, area practices, and manufacturer recomendations.

~~~ Keep it Real ~ Nice and Chilly ~~~

~~~~~~~Kung Fu Maintenance ~~

~~~~~~~~~~ P.S. ~ Stay Cool ~

Posted by Kung Fu Maintenance in Air Conditions, The KFM Blog, Tips, 2 comments

Kung Fu Maintenance Interactive Menu ~ A.C. 101

The Year is A.C. 101 ~ Welcome to Kung Fu Maintenance Land.

Welcome to my Kung Fu Maintenance A.C. 101 video interactive. You can watch a video discourse on each component of the air conditioner system by clicking on the part or part title in this interactive video menu.

Some of the videos for parts I am still developing and editing. I will add them to the mix as they are completed. Hope you like it. Please do mention it to some friends.

These videos discuss each parts role in the air conditioner system. The thermostat, disconnect, time delay fuses, breaker, contactor, run capacitor, start capacitor, fan motors, compressor, hard start kit, compressor protector (time delay, delay on break, delay on make), filter driers, accumulator, refrigerants, wiring, terminal leads, wire connectors, door switch, fan relay, blower wheel, evaporator coil, restrictive devices (capillary tubes, thx valves etc…), condensor, schrader valves, ports, critical seals, shut offs, thermal switches, directional switches, start, common, run, leads, compressor, hermetic, fans, baffles, gauges, high side (gas, pressure,), low side(liquid, suction), tubing, ACR copper, air handlers, relays, solenoids, air filters, condensate drains, condensate pans, gravel wells, french drains, all working together to take the heat off of you and bring you cold air.

I hope these videos treat you well like a cool glass of lemonade on a blistering hot day. A bit of rejuvenation. So far all of these videos were made on over one hundred degree days. They can’t all be easy, but I’ll settle for a few. I am happy to pass on and share my experiences with you so that your experiences can be a bit easier through understanding. I am out to save you time, money, energy, headache, and backache.

~I hope to hear about or see you gaining some nice ground~

~~Kung Fu Maintenance~~~

~~James H. Klovach~

Posted by Kung Fu Maintenance in Air Conditions, The KFM Blog, Tips, 1 comment

Making Your Maintenance or Maintenance Supervisor Job Much Easier

Rooftop Palm Springs SunsetMaking Your  Job Much Easier

1) Line up Quality Vendors. Talk is cheap but quality is priceless. Watch for vendors that care and are into what they do. Craftsmanship may seem a lost art but it does still exist.

2) Keep prices competitive. Paying more doesn’t mean you will get a better job anymore. Once upon a time it did. It still can but it is rare.

3) Encourage their performance. When you do find quality, value their work with more work and appropriate pay. Recognize extra efforts. Give them opportunities to bid for other jobs.

4) They must understand that results are not an option. We must understand that results are not an option. Our employers certainly understand that results are not an option. Our customers hope that results are not an option.

5) Line up jobs and line up bids. List all the most common repairs needed at your property and develop plans of action. Recognize the jobs that will cost you much less time, effort and money, to do in house. Determine which jobs will save you the most time, energy, and money to vend out. Make sure you are getting apples to apples bids. The more you understand about needed repairs, the easier time you will have developing a plan. The better plans you develop the easier you can communicate it to your vendors. The better you communicate the better chance your vendors will have of meeting your expectations.

6) Keep a running wish list for capital improvements.

7) Research better solutions for the problems that plague you. Develop a jig if possible or a template to make jobs that must be repeated much easier.

8) Keep a running list of supplies and parts needed. This way when you do order parts and supplies, you don’t forget anything.

9) Develop and Implement the best preventative maintenance program you can. When you prevent things from going wrong in bulk, life becomes so much easier. Developing an understanding of the challenges at your property and building up solutions will save you countless headaches.

Experience can be tough but when you learn from it difficulty will be less on in. Think strategically. Recycle your tough experiences into hitting first where it counts.


~~~ Gain Some Nice Ground ~~~

~~~~~~~~~~~ Kung Fu Maintenance ~~~~~~~~~~~


Posted by Kung Fu Maintenance in The KFM Blog, Tips, 2 comments

How to Properly Test and Balance Bodies of Water

Artwork from the book Kung Fu Maintenance Chapter 27

Testing and Balancing Pools and Spas ~ Balancing Water


Most pool test kits come with instructions in the lid of the kit. Always follow instructions for the particular kit you are using as there are several different kinds that use different color metric systems. I like the “Taylor” kits that use a red color table to indicate ph and chlorine (disinfectant) levels.

The test kit comes with a plastic dual chamber vial. The larger side is for testing PH and the smaller side for testing chlorine levels. When you take your water samples you always want to dip the test tubes in upside down, elbows length, and then flip the vials over so you are getting a water sample that is not from the surface of the water. This way you get a more accurate reading of what is in the body of water. Splash out enough water to the top line that is marked on each vial. 5 mL of water is used for the ph side and 3 mL of water for the chlorine side.


For testing the PH drop five drops of R-4 into the 5 mL chamber. For the chlorine test drop five drops of R-1 and 5 drops of R-2 reagent into the 3 mL chamber. It is kind of funny that the smaller side gets two sets of drops but this is how it is and may the oddness help you to remember. Always use the caps that come with the kit to mix the reagents with the water samples. You never want to use your hands to cover the tops as that would contaminate your tests. Be as accurate as possible as to the amount of water in the vials and the amount of drops added.

Purples are alkaline, yellows acidic, and reds are mostly ok. You want to test and balance your ph first. The Ideal ph is 7.6. At 7.4 to 7.8 you are ok but 7.6 is the target. If your ph is to low that is acidic you will want to raise the ph with a “ph up” such as soda ash. If your ph is too high that is alkaline you will want to lower it with a “ph down” such as muriatic acid. Ph that is too low or too high can literally eat your pipes. Water will seek out its own balance and will take material from wherever it needs to in order to balance itself. Also disinfectant effectiveness can be blocked by ph’s that are off. This is why testing and balancing ph is always first priority.

For chlorine you want at least one parts per million chlorine. I like to keep my spas a little bit higher for chlorine at about three to four  parts per million because it is a smaller body of water and the average person sweats about one pint of sweat into the water every thirty seconds in a spa. There are other reasons I like my disinfectant levels a little higher that you can learn about in my book Kung Fu Maintenance but I will spare you the details here.

Now when you are doing your chlorine test if you see your drops turn red for a second and then go clear real fast this is because there is too much chlorine in the water and it is bleaching out the test. This is what happens when there is over ten parts per million of chlorine in the water. To remedy the situation you need to either dilute the water or use a chlorine neutralizer.

If it is a spa with the chlorine to high and you have a pool nearby then you could just transfer the water to the pool so you are not throwing away your chlorine. Empty one fourth to one third of the water. Refill the spa than retest and repeat the process, until you have lowered your spa at least below eight and preferably below five parts per million before reopening the pool or spa for use.

If you use a chlorine neutralizer make sure to retest the body of water for ph levels as well as chlorine as many of the chlorine neutralizers will drop the ph levels significantly and you will need to add soda ash or another “ph up” to maintain the ph levels. It is all fun and games till someone’s hair gets turned green (or white). Always follow manufacturer’s instructions when using chemicals. Wear appropriate personal protective equipment such as gloves and or safety glasses. It is also a good idea to read MSDS sheets before handling chemicals and to carry a copy of the sheets with you when servicing your pools.


~~ Improve Your Balance ~~~~~~~~


~~~~~~~~~~~~ Kung Fu Maintenance ~~~~~~~~~~~~~


Posted by Kung Fu Maintenance in The KFM Blog, Tips, 2 comments

P.O.A. From R-22 to Dupont™ ISCEON® MO99™ by 20/20

A Strategy for Refrigerant Conversion From R-22 to R438A


If you are in the maintenance or HVAC business you have probably heard by now about the R-22 phase out under the Montreal Protocol. Perhaps you even read my previous article on the subject (Retrofitting Reasons to use Dupont™ ISCEON® MO99™ instead of R410A). If you haven’t read it yet I recommend you read it before, or after, as it will give you a better understanding of the factors.

R-22 is being phased out by 2020 due to its ozone damaging ways. There was a short time that production of condensers that use R-22 had stopped. Now companies are manufacturing condensers that can use R-22 again. They used to sell them as pre-charged units with R-22. Now manufacturers have found that they can only sell them as dry units. Dry units need to be charged with refrigerant at the time of install.

Isceon M099 is a relatively new refrigerant brought on the scene by Dupont. There are some very nice qualities to this refrigerant a.k.a. R438A. It has very similar operating characteristics to R-22 without the ozone abuse. At the time of this writing you can get a twenty five pound can of Isceon for just a few dollars over two hundred dollars and a thirty pound can of R-22 for about one eighty ( expect these prices to change quite quickly, R-22 will most likely climb in price as its dooms day approaches. Isceon will most likely stay the same, or it may go down, or up, a bit as it gains popularity). Isceon has a pressure temperature relationship very close to R-22 so the majority of HVAC techs will have an easy time switching over. Oil does not need to be changed, system does not need to be flushed, (unless a compressor burned out), wiring generally does not need to be changed (always check manufacturer specs), evaporator coils do not need to be replaced. The one thing that does need to happen is the seals need to be replaced because the seals that were used with R-22 will shrink when charged with R438A (Isceon M099). This leads right into my plan of attack.

When you need to replace a condenser, this is the time to change over to Isceon. The new dry unit will have all new seals. If a system needs to be opened up for any reason, evaporator coil replacement, filter dryer replacement, etc…. or if a system has lost its charge due to a leak, these are all good times to retrofit to Isceon. Recover R-22 and use it to maintain your other R-22 units (after acid testing it and verifying it is ok to use). Make sure all Schrader valves, or other seals are replaced, a new filter drier is installed (anytime the system is opened), the system is leak tested with nitrogen, and vacuumed down to 250 microns (29.91 Hg) for a good amount of time to boil off any moisture. Now the system is ready to be charged with Isceon. The nice thing about Isceon is it has a cooler discharge temperature at the heart of the A/C (easier on the compressor).

Make sure to very clearly label the new units. Make it clear that they are charged with Isceon.R438A comes in a blue can so it would be good practice to color code the new units with a blue label that matches the refrigerant. Refrigerants should never be mixed or topped off with a different type.  If you have several buildings in a complex and the condensers are nearing the end of their lifespan it may be smart to retrofit one building or so, year by year as a capital improvement. You can reuse good fan motors, blades, baffles, lids and such from the phased out units to better offset the costs and help make it easier to keep your remaining units working. This way you can phase into Isceon (R438A) before R-22 is phased out.


~~~~ Save Some Wallet ~~~~~

~~~~~~~~~~~ Kung Fu Maintenance~~~~~~~~~~~~~~~


Posted by Kung Fu Maintenance in Air Conditions, The KFM Blog, Tips, 3 comments